Automating a manual antenna tuner

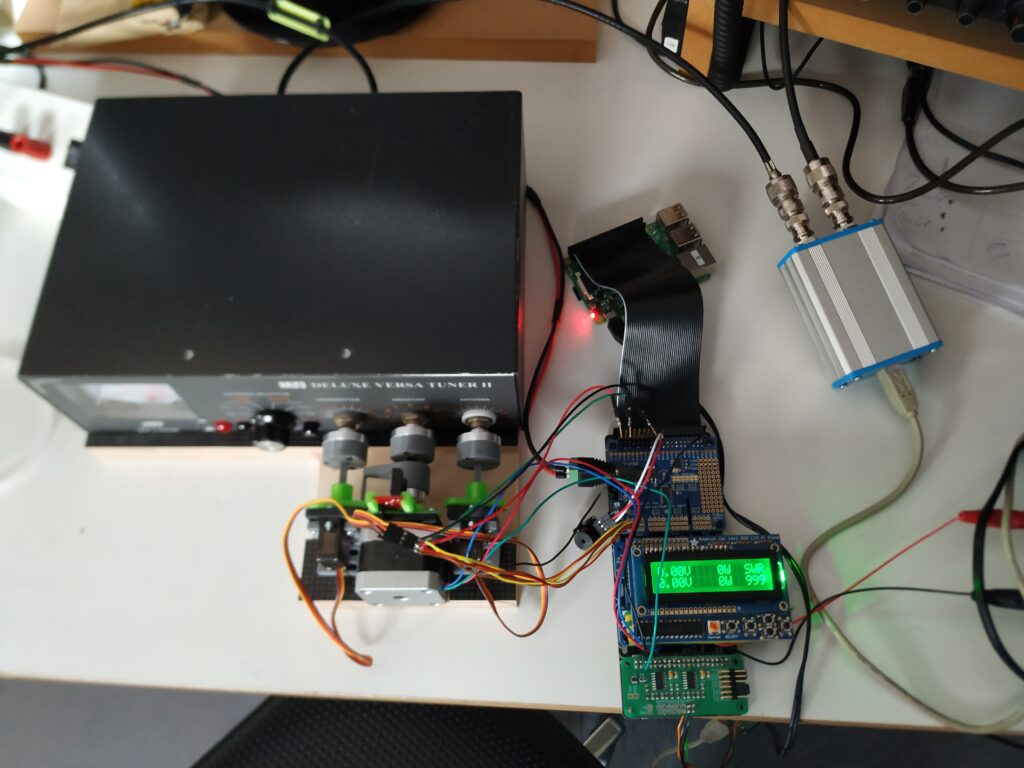
MFJ Versatuner with servo’s, a stepper and a Raspberry Pi

Automatic antenna tuners are expensive, manual antenna tuners are slow. So it has been a long time I dreamed of making my own automatic system.

As this year I was following a raspberry pi class and we needed to make our own project I decided to finally try to make this automatic tuner.

Summary:
– Forward and reflected power are measured with a Boxa Swr bidirectional coupler combined with an ADC
– SWR is calculated in the raspberry pi and displayed on an LCD
– When SWR is to high an alarm is sounded in CW
– after pushing a button the capacitors and the coil in the tuner are reset to 0. For the capacitors I use 2 servos, for the coil I use a stepper motor. All mechanical connections are made using 3d-printed parts. The reference point for the stepper motor is made using an infrared port.
– next is the tuning operation:
— the ‘transmitter’ capacitor is sweeped over it’s full range and swr is measured every degree. Then this capacitor is returned to it’s best position
— next idem for the ‘antenna’ capacitor
— sweeping operation is repeated for maximum 4 times, if the SWR is below 1,5:1 then tuning is stopped. If SWR is above this limit then the coil is moved to the next setting and the sweeping is repeated
– built in securities:
— all alarms on the LCD and in morse code
— alarm when SWR is to high
— alarm when tx-power is to high for tuning
— coil/stepper can not be switched when there is rf-power

Remarks:
– no tuners have been harmed in any way for this operation!
– Was the raspberry pi the best choice for this? This could probably have been done using some microcontroller instead but the class I followed wat not arduino or esp 32 🙂

The AVG Business firewall is stopping my SunSDR2 pro

Today AVG Business (= the paid version of the antivirus software) automagically installed its new version. And, [censored swear word], after restarting my pc, no more connection between my SunSDR and my PC.
Shutting off the firewall solves the problem but is of course not really a long term solution.
I have added the ExpertSDR software and the network address of the SunSDR to the firewall settings but to no avail for now. I guess I’ll have to dig a little deeper to get it running again.

UPDATE: I messed around for a while trying to allow the SunSDR and ExpertSDR to get through the firewall but to no avail. As I use a pretty decent firewall in my router I decided to simply uninstall the AVG firewall component.

Arduino Leonardo external keypad

Am I the only one finding it difficult to find the ctrl-alt-down key combination to tune to the next mult in N1MM+ logger when I am 30hrs into a contest?

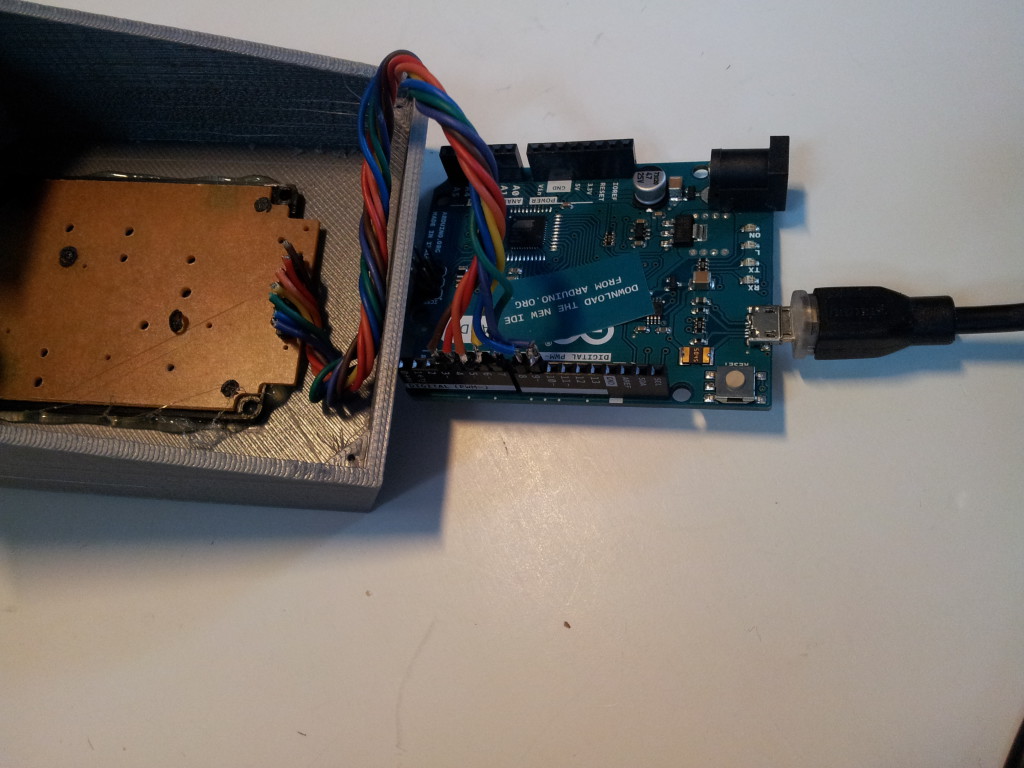
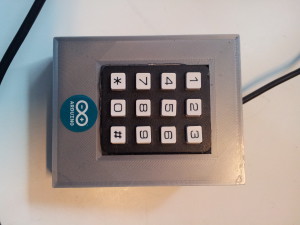
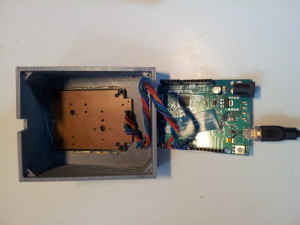
This is the solution I made for it: an extra keypad that emulates these key combinations (or whatever key combination you want to program):
Arduino keypad closeup

Arduino keypad internals 1

2016-03-26 09.29.12

The core is an Arduino Leonardo with a 12 key keypad. These keypads can be salvaged out of an old phone or purchased online. Of course if you need less keys you can use pushbuttons also.

I printed the case with my Delta Rocket 3d-printer.

For the complete beginners with Arduino there is a lot to be found on the net. I found this Instructable very helpful.

This is a pretty easy project, the 2 hardest things are to figure out how the matrix of the keypad is to be wired and what keycodes you need to send to the computer.

In most helpfiles for the Arduino they say that the Leonardo sends ASCII to the computer but this is not true. In fact the Leonardo sends keycodes and they are based on the configuration of the ‘real’ keyboard that is connected and configured in Windows (or any other operating system I guess). As far as I could test the Leonardo uses the same keyboard ‘layout’ as the standard US QWERTY keyboard. So for us Belgians with our AZERTY keyboards it’s not as simple. I had to try out dozens of combinations before finding the correct ones.

For now this is the code I use (not all keys are implemented as of now):

/*
ON5MF/OQ6A Arduino Leonardo Keypad

I did not really 'invent' this myself, I only implemented stuff found on the net. Please feel free to use,
copy, enhance this code at your own will.

If you use it for commercial purposes I'd like to receive at least 50% of the gains ;-)

If you like the code or if you find some enhancements or improvements please let me know.

73 es have fun with it.

Jurgen ON5MF
www.on5mf.be
*/

/*
v001 = testing if keypad works
v002 = added ctrl-left and ctrl-right
v003 = next spot up and down
*/

/* keys and functions
 1  next spot up left radio   ! ctrl-left ctrl-up
 2  Escape                    ! esc
 3  next spot up right radio  ! ctrl-right ctrl-up
 4  next spot dwn left radio  ! ctrl-left ctrl-dwn
 5  back to CQ frequency      ! alt-Q
 6  next spot dwn right radio ! ctrl-right ctrl-dwn
 7  next mult up left radio   ! ctrl-left ctrl-alt-up
 8  turn rotator              ! alt-j
 9  next mult up right radio  ! ctrl-right ctrl-alt-up
 0  swap radios               ! alt-F5
 *  next mult dwn left radio  ! ctrl-left ctrl-alt-dwn
 #  next mult dwn right radio ! ctrl-right ctrl-alt-dwn
 */

//Libraries
#include <Keypad.h>
//----- end of libraries

//Constants
const byte ROWS = 4; //four rows
const byte COLS = 3; //three columns
//----- end of constants

//Variables
//define the symbols on the buttons of the keypads
char hexaKeys[ROWS][COLS] = {
  {'1', '2', '3'},
  {'4', '5', '6'},
  {'7', '8', '9'},
  {'*', '0', '#'}     //ok
};
byte rowPins[ROWS] = {4, 9, 8, 6}; //connect to the row pinouts of the keypad
byte colPins[COLS] = {5, 3, 7}; //connect to the column pinouts of the keypad
char ctrlKey = KEY_LEFT_CTRL;
char leftKey = KEY_LEFT_ARROW;
char rightKey = KEY_RIGHT_ARROW;
char upKey = KEY_UP_ARROW;
char downKey = KEY_DOWN_ARROW;
//----- end of variables

//initialise Keypad
Keypad customKeypad = Keypad( makeKeymap(hexaKeys), rowPins, colPins, ROWS, COLS);
//----- end o initialise Keypad

void setup() {
  Serial.begin(9600);
  Keyboard.begin();
}

void loop() {
  char customKey = customKeypad.getKey();
  if (customKey == '1') {
    Keyboard.press(ctrlKey);
    Keyboard.press(leftKey);
    delay(100);
    Keyboard.releaseAll();
    delay(100);
    Keyboard.press(ctrlKey);
    Keyboard.press(upKey);
    delay(100);
    Keyboard.releaseAll();
  }
  if (customKey == '4') {
    Keyboard.press(ctrlKey);
    Keyboard.press(leftKey);
    delay(100);
    Keyboard.releaseAll();
    delay(100);
    Keyboard.press(ctrlKey);
    Keyboard.press(downKey);
    delay(100);
    Keyboard.releaseAll();
  }
  if (customKey == '7') {
    Keyboard.press(ctrlKey);
    Keyboard.press(leftKey);
    delay(100);
    Keyboard.releaseAll();
  }
  if (customKey == '*') {
    Keyboard.press(ctrlKey);
    Keyboard.press(leftKey);
    delay(100);
    Keyboard.releaseAll();
  }
  if (customKey == '3') {
    Keyboard.press(ctrlKey);
    Keyboard.press(rightKey);
    delay(100);
    Keyboard.releaseAll();
    delay(100);
    Keyboard.press(ctrlKey);
    Keyboard.press(upKey);
    delay(100);
    Keyboard.releaseAll();
  }
  if (customKey == '6') {
    Keyboard.press(ctrlKey);
    Keyboard.press(rightKey);
    delay(100);
    Keyboard.releaseAll();
    delay(100);
    Keyboard.press(ctrlKey);
    Keyboard.press(downKey);
    delay(100);
    Keyboard.releaseAll();
  }
  if (customKey == '9') {
    Keyboard.press(ctrlKey);
    Keyboard.press(rightKey);
    delay(100);
    Keyboard.releaseAll();
  }
  if (customKey == '#') {
    Keyboard.press(ctrlKey);
    Keyboard.press(rightKey);
    delay(100);
    Keyboard.releaseAll();
  }
}
Do you really want to pay €49 to be able to program your (mobile) radio through your computer?

For years I have been struggling to manage the 1000 memories on my FT-7800 mobile radio. Memory channels, subtones, memory banks ==SIGH==

Recently a friend (thanks Jan ON4KB) gave me the kit he bougth from Yaesu for the FT-8800 and of course, the cable was correct for my FT-7800 but the software didn’t work ==shame on you Yaesu!==.

That’s when I decided to get some help from Google and I found CHIRP, a free, open-source tool for programming your amateur radio. It supports a large number of manufacturers and models, as well as provides a way to interface with multiple data sources and formats.

I tested it for my radio and it works very well indeed! Downloading the data already in the radio, modifying it on the pc and uploading it to the radio again all in a breeze!

CHIRP supports over 60 different radios from 5 or 6 brands (including the ‘big’ ones of course) and is available for Windows, Mac and Linux.

Programming cables can easily be found on Ebay (for some €12) or you can make your own.

My current project

Ever tried to manually switch your antennas and bandpass filters 30 hours into a contest? I have been doing it for years. 🙂 (And I have been complaining about it for ages too)

But the solution is near:

band decoder 001 band decoder 002

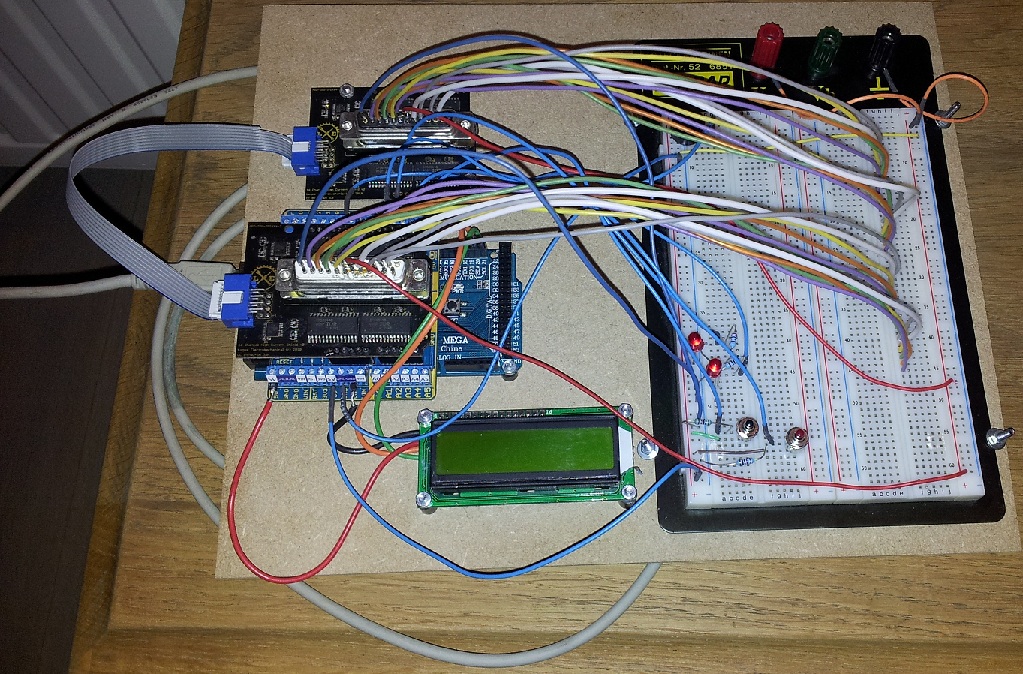
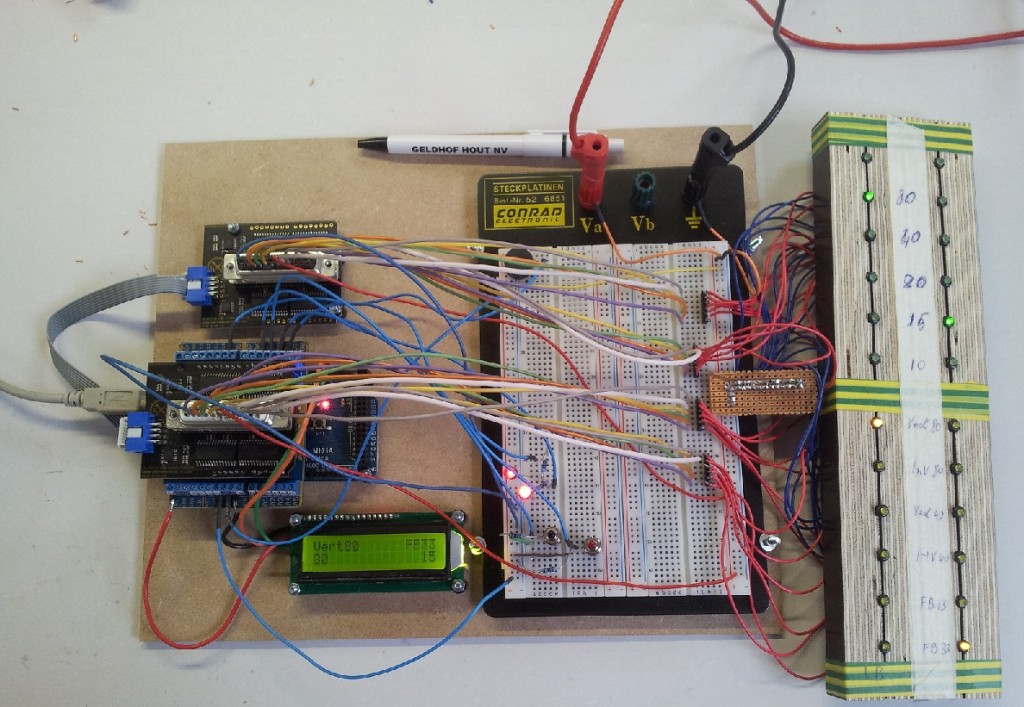
This is the prototype for my new universal band decoder.

The hardware is an Arduino (in the pictures is a Mega, it will be replaced by a UNO r3 in the finished product) and 2 4×4 Driver Shields from Logos Electromechanical.

The goal is to switch my SixPak and my 2 Dunestar 600 band pass filters for SO2R.

The data comes from the pc (over the usb port) using the Open Two Radio Switching Protocol (OTRSP) which is supported by N1MM and DXLab logging software.

For now this is a work in progress,  so come back here soon to follow the evolution!

Designing antennas using a genetic algorithm?

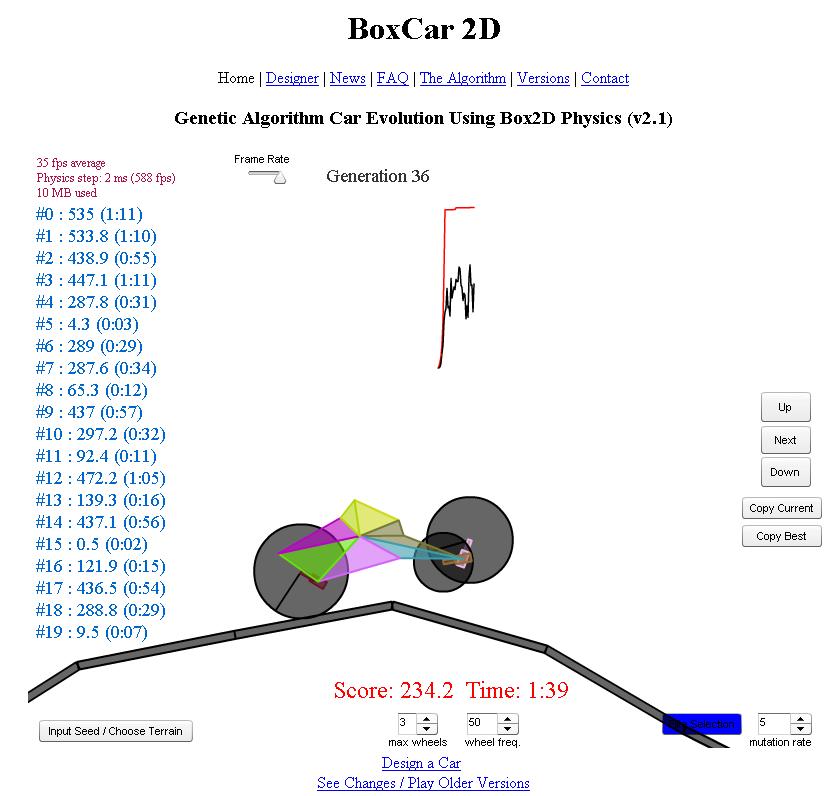
A few days ago I found a nice piece of software on the internet: BoxCar 2D. This is a way to design a car using a genetic algorithm: a population of cars is created at random and then tested on a track chosen by the user. Then the best cars ‘mate’ to get a next generation. Together with a set mutation rate the cars improve over the generations.

Warning: watching this is addictive, it’s far better than television!

My programming skills are rather limited but I wondered if someone maybe could design antennas using one of the (mini)NEC engines and this genetic system?

Update: it seems that this is not such a new idea, at least for developing antennas. A little googling for ‘genetic algorithm antenna’ gave me some 160000 results 🙂

SuperNec seems to be great software for this but at $6080 it seems I’ll stick to Eznec and MMANA for a while.

Pretty frustrated after EU PSK63 QSO Party

I quit…

Or at least my PC forced me to by deciding to let me down about 0630hrs in the contest. Due to a for now unknown reason  the N1MM-loggerFldigi combo froze and I had to reboot the PC. But, after rebooting and starting Windows XP, both displays stayed black. After some trying (rebooting multiple times, disconnecting and reconnecting all cables,…)  I could get an image on only one of the displays but in the wrong resolution. Setting the resolution back to the correct values again gave me a black screen. This time I could not get back to the one working screen any more so after about an hour I decided to quit the contest. Yes I know, winners never quit, quitters never win… but it’s pretty hard to work a digi-mode contest without a computer, don’t you think?

but I learned a lot… Continue reading Pretty frustrated after EU PSK63 QSO Party