- Day 7: at least some of the frustrations are over, for now
- If I wait a few minutes after switching on the radio I don’t have any TX-problems.
- I got a reply from ML&S that I can return the bad adaptor plugs but they don’t have any better ones. I still have to check if it’s even worth sending them back, shipping costs will probably be higher than their value.
- The CAT works! I uninstalled com0com and started from scratch. I’m using W7pro on my PC and the procedure to get com0com from this site and then followed the tips from the DXLabsuite site again and now it works like a charm!
TIP: the readme-file that is included with com0com at this time is not correct. The procedure to get everything up and running is the one from the DXLab site (at least for 64-bit W7):- disable User Account Control (UAC) on your pc and reboot
- install com0com
- create a COM-pair
- use one of the created COM-ports for the transceiver and the other one for the logging program
Author: Jurgen
ON5MF goes SDR (4)
or at least tries to…
- Day 6: getting frustrated
- still no answer from ML&S for their faulty mini-UHF to SO239 connectors
- still no answer from Vassil for the fact sometimes the rig does not get into TX
- still no luck getting the virtual serial ports up and running to connect the CAT port to DXlab’s commander. After 4 hours of installing drivers, deleting blocked COM-ports, uninstalling drivers, restarting my pc n² times still no communication over CAT.
Time to get in front of the TV with a drop of single malt…
ON5MF goes SDR (3)
- Day 5:
- start the software, switch on the radio. Press PTT => again no TX! This is getting frustrating!
I already posted this on the Expert Electronics forum yesterday. Lets see if we get a reply with a solution.
Otherwise this adventure will have been very short lived. Return everything to sender? - after restarting the software and the transceiver a few time it works again.
Intermittant hardware problem? - Once it’s running the transceiver is fun to use!
- Tried to get the CAT working but no luck with the user manual. After a quick question on the forum I learn that I’ll need to set up 2 virtual com-ports for the communication between the SunSDR and my logging program. But that will be for an other day.
- start the software, switch on the radio. Press PTT => again no TX! This is getting frustrating!
ON5MF goes SDR (2)
- Day 4:
- Switch on the radio, great there’s a contest going on, lets try to make some QSOs on 40m.
First try, very strong station but hey, he can’t hear me. Try again a few times.
Suddenly I notice I don’t get any power out…
I restart the radio, I restart the software, I try the other antenna connector, I reset all parameters to default but all to no avail.
Game over already? - Update: I switched off the software to write the small text above. A few minutes later I start the software again and guess what… everything works again! I’m back in the running but I can’t figure out what could have gone wrong. Time to make some more QSOs!
- some conclusions:
- QRP works! 🙂 Also with about 15W you can make QSO’s!
- according to some of the stations I worked this cheap computer headset has a pretty good modulation. Maybe with a little tweaking of the equaliser I can get it even better.
- Switch on the radio, great there’s a contest going on, lets try to make some QSOs on 40m.
ON5MF goes SDR (1)
Due to the lowering in price and the low GBP vs EUR exchange rate I finally decided to offer myself a SunSDR2pro. I know, the SunSDR are not produced in the UK but the price in the UK was about 15% lower than in the rest of the EU.
These are my findings trying to start the transceiver:
- 23+ years in ham radio for now and I feel a complete beginner! This is so completely different from the ‘knobbed’ transceivers I have used in all those years.
- Day 1:
- first things first, installing the software. I downloaded version 1.1.2 from the Expert Electronics site.
- Next came trying to connect the transceiver to the pc. It should be possible to run the transceiver over the LAN/WAN but for simplicity I chose to connect the network cable directly between the transceiver and the pc.
- the user manual says to configure the pc network card so it gets its IP number via DHCP. Well… this does NOT work for me. Of course Google is your best friend and I found this Youtube movie made by ML&S explaining how to set up the pc to the correct fixed IP-address.
After watching this movie I could let the software connect to the transceiver. Finally the spectrum and waterfall screens came to life.
TIP: set your PC to a fixed IP adress in the 192.168.50.*** range.
- the user manual says to configure the pc network card so it gets its IP number via DHCP. Well… this does NOT work for me. Of course Google is your best friend and I found this Youtube movie made by ML&S explaining how to set up the pc to the correct fixed IP-address.
- after some fiddling and attaching a small test wire to the antenna connector I could listen to the different broadcast stations in WFM. You have to start somewhere 🙂
- Now was the time to connect a microphone to the rig… but alas, a complete flea market in the attick but no microphone that can be connected directly. It was getting pretty late at night so I gave up and went to bed.
- Day 2:
- still no microphone in stock so time to try something else: can I get the CAT interface to work with my DXlab logging software? No luck, DXlab’s commander gives ‘COM4 already in use’. So for some reason the SunSDR is blocking some of my COM ports. A quick search on Google and on the SunSDR forum does not yield a solution so I started a new thread on this forum.
I really need Commander to have my remote antenna switch choose the right antenna. Without Commander running all my coax cables are connected to ground.
- still no microphone in stock so time to try something else: can I get the CAT interface to work with my DXlab logging software? No luck, DXlab’s commander gives ‘COM4 already in use’. So for some reason the SunSDR is blocking some of my COM ports. A quick search on Google and on the SunSDR forum does not yield a solution so I started a new thread on this forum.
- Day 3:
- Vassil RN6LHF the developer of the SunSDR has replied to my question. I should use the latest version of the software. And indeed v1.1.3 RC7 solves my COM-port problem.
TIP: always use the latest version of the software!
So time to connect a real antenna to the rig and listen around on HF. - A quick trip to the shop today yielded me a computer headset I could connect to the MIC1 port of the SunSDR.
- New problem found: the jumper cable from mini UHF to PL259 works OK but the adapter plugs I purchased separately can not be tightened correctly on the transceivers connectors. I guess I’ll have to send them back to the supplier.
- After connecting my LDG AT-200ProII it’s time to try a qso and, eureka, I manage to work a belgian station on holiday in EA on 40m.
- To get some decent power out in SSB using the computer headset I had to set the mic gain to maximum and compression pretty high. But that should probably work better once I get the correct interface cable to connect my Heil Pro-Set 4 to the SunSDR.
- The transceiver gets pretty hot even in RX. The internal thermometer indicates 46°C at this moment. According to the user manual this should be ok. I prefer to have my electronics running cooler. So lets see if I can find a suitable ventilator in my junkbox.
- Vassil RN6LHF the developer of the SunSDR has replied to my question. I should use the latest version of the software. And indeed v1.1.3 RC7 solves my COM-port problem.
Antenna switch quality?
What does a ham do when the weather is bad and there is nothing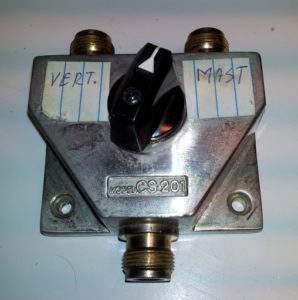 exciting going on on the bands?
For some tests I needed a coax switch and I found my old Daiwa CS-201 in my drawer. I vaguely remembered there was something wrong with it the last time that I used it.
As soon as I connected a coaxial cable I noticed one of the N-type connectors on the switch was loose. So it was time to get out the screwdriver.
This is what I noticed:
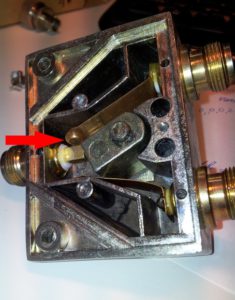 Look at the contact at the red arrow! Due to the top right coax connector rotating when connecting a cable the contact was barely touching the post it should touch. Not visible on the picture was that the bottom contact had the same problem but of course this was rotated in the other direction.
And, this is a switch rated for 1 kW!
I could pretty easily fix the problem by unscrewing the little black screws and rotating the coax connectors back to where they were supposed to be. But I guess this will only last until I have connected and disconnected the coaxial cables a few times again.
Arduino Leonardo external keypad
Am I the only one finding it difficult to find the ctrl-alt-down key combination to tune to the next mult in N1MM+ logger when I am 30hrs into a contest?
This is the solution I made for it: an extra keypad that emulates these key combinations (or whatever key combination you want to program):
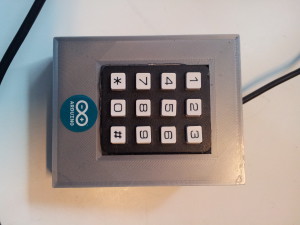
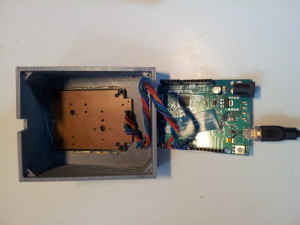
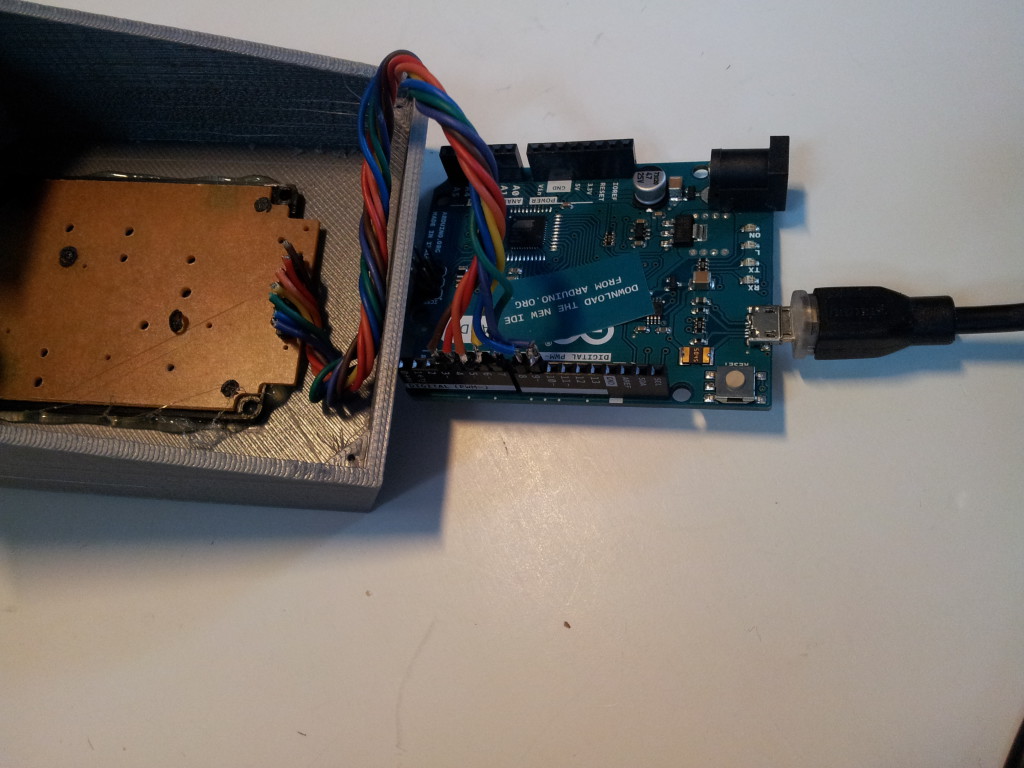
The core is an Arduino Leonardo with a 12 key keypad. These keypads can be salvaged out of an old phone or purchased online. Of course if you need less keys you can use pushbuttons also.
I printed the case with my Delta Rocket 3d-printer.
For the complete beginners with Arduino there is a lot to be found on the net. I found this Instructable very helpful.
This is a pretty easy project, the 2 hardest things are to figure out how the matrix of the keypad is to be wired and what keycodes you need to send to the computer.
In most helpfiles for the Arduino they say that the Leonardo sends ASCII to the computer but this is not true. In fact the Leonardo sends keycodes and they are based on the configuration of the ‘real’ keyboard that is connected and configured in Windows (or any other operating system I guess). As far as I could test the Leonardo uses the same keyboard ‘layout’ as the standard US QWERTY keyboard. So for us Belgians with our AZERTY keyboards it’s not as simple. I had to try out dozens of combinations before finding the correct ones.
For now this is the code I use (not all keys are implemented as of now):
/*
ON5MF/OQ6A Arduino Leonardo Keypad

I did not really 'invent' this myself, I only implemented stuff found on the net. Please feel free to use,
copy, enhance this code at your own will.

If you use it for commercial purposes I'd like to receive at least 50% of the gains ;-)

If you like the code or if you find some enhancements or improvements please let me know.

73 es have fun with it.

Jurgen ON5MF
www.on5mf.be
*/

/*
v001 = testing if keypad works
v002 = added ctrl-left and ctrl-right
v003 = next spot up and down
*/

/* keys and functions
 1  next spot up left radio   ! ctrl-left ctrl-up
 2  Escape                    ! esc
 3  next spot up right radio  ! ctrl-right ctrl-up
 4  next spot dwn left radio  ! ctrl-left ctrl-dwn
 5  back to CQ frequency      ! alt-Q
 6  next spot dwn right radio ! ctrl-right ctrl-dwn
 7  next mult up left radio   ! ctrl-left ctrl-alt-up
 8  turn rotator              ! alt-j
 9  next mult up right radio  ! ctrl-right ctrl-alt-up
 0  swap radios               ! alt-F5
 *  next mult dwn left radio  ! ctrl-left ctrl-alt-dwn
 #  next mult dwn right radio ! ctrl-right ctrl-alt-dwn
 */

//Libraries
#include <Keypad.h>
//----- end of libraries

//Constants
const byte ROWS = 4; //four rows
const byte COLS = 3; //three columns
//----- end of constants

//Variables
//define the symbols on the buttons of the keypads
char hexaKeys[ROWS][COLS] = {
  {'1', '2', '3'},
  {'4', '5', '6'},
  {'7', '8', '9'},
  {'*', '0', '#'}     //ok
};
byte rowPins[ROWS] = {4, 9, 8, 6}; //connect to the row pinouts of the keypad
byte colPins[COLS] = {5, 3, 7}; //connect to the column pinouts of the keypad
char ctrlKey = KEY_LEFT_CTRL;
char leftKey = KEY_LEFT_ARROW;
char rightKey = KEY_RIGHT_ARROW;
char upKey = KEY_UP_ARROW;
char downKey = KEY_DOWN_ARROW;
//----- end of variables

//initialise Keypad
Keypad customKeypad = Keypad( makeKeymap(hexaKeys), rowPins, colPins, ROWS, COLS);
//----- end o initialise Keypad

void setup() {
  Serial.begin(9600);
  Keyboard.begin();
}

void loop() {
  char customKey = customKeypad.getKey();
  if (customKey == '1') {
    Keyboard.press(ctrlKey);
    Keyboard.press(leftKey);
    delay(100);
    Keyboard.releaseAll();
    delay(100);
    Keyboard.press(ctrlKey);
    Keyboard.press(upKey);
    delay(100);
    Keyboard.releaseAll();
  }
  if (customKey == '4') {
    Keyboard.press(ctrlKey);
    Keyboard.press(leftKey);
    delay(100);
    Keyboard.releaseAll();
    delay(100);
    Keyboard.press(ctrlKey);
    Keyboard.press(downKey);
    delay(100);
    Keyboard.releaseAll();
  }
  if (customKey == '7') {
    Keyboard.press(ctrlKey);
    Keyboard.press(leftKey);
    delay(100);
    Keyboard.releaseAll();
  }
  if (customKey == '*') {
    Keyboard.press(ctrlKey);
    Keyboard.press(leftKey);
    delay(100);
    Keyboard.releaseAll();
  }
  if (customKey == '3') {
    Keyboard.press(ctrlKey);
    Keyboard.press(rightKey);
    delay(100);
    Keyboard.releaseAll();
    delay(100);
    Keyboard.press(ctrlKey);
    Keyboard.press(upKey);
    delay(100);
    Keyboard.releaseAll();
  }
  if (customKey == '6') {
    Keyboard.press(ctrlKey);
    Keyboard.press(rightKey);
    delay(100);
    Keyboard.releaseAll();
    delay(100);
    Keyboard.press(ctrlKey);
    Keyboard.press(downKey);
    delay(100);
    Keyboard.releaseAll();
  }
  if (customKey == '9') {
    Keyboard.press(ctrlKey);
    Keyboard.press(rightKey);
    delay(100);
    Keyboard.releaseAll();
  }
  if (customKey == '#') {
    Keyboard.press(ctrlKey);
    Keyboard.press(rightKey);
    delay(100);
    Keyboard.releaseAll();
  }
}
SSB Fieldday 2014
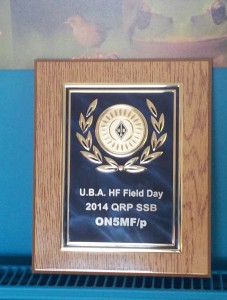
I wanted to prove to myself I could do a full fieldday (set up the station, operate 24 hours and tear down the station) without any help from anyone else. A few days ago I received the plaque for my first place in the QRP class. Thanks UBA!
I wrote an article for CQ-QSO about my experiences in the fieldday but I haven’t found any time to translate it to English yet. Members of the UBA can read it on the UBA website in dutch or french.
I’m looking forward to work you all in the next UBA SSB fieldday first weekend of september!
We need more sunspots!
Soon back on the air!
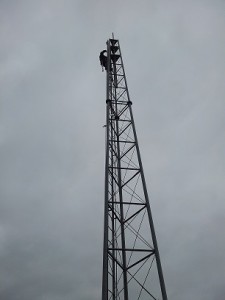
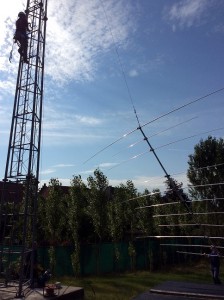
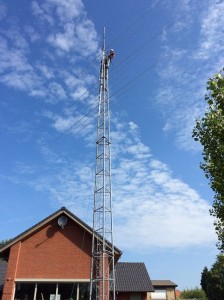
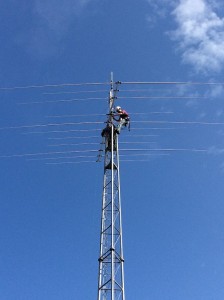
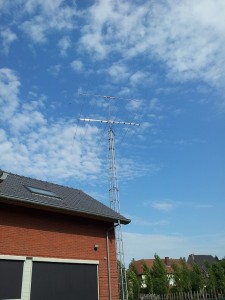
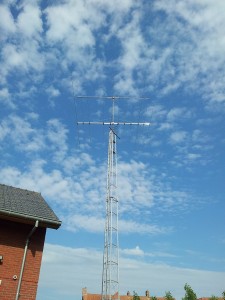
Finally my OB11-3 and new rotator made it up the tower.
For now no QSOs have been made because of course there’s still a lot of work to do like running new coax cables and the rotator control cable up to the first floor shack and putting the wires for 30-40-80 back up.
Time permitting I’ll try to be on the air in a week or 2 max. I’d like to test in the DMC Rtty contest in 2 weeks from now.
Here are some pictures:
I wish to thank Tom from Optibeam for the advice and help provided in choosing the ideal antenna configuration for my needs!
